Tools like Perplexity, ChatGPT, Claude, and NotebookLM have transformed how we work with PDFs, technical articles, and entire books. Instead of flipping through pages one by one, we now get summaries, answers, and explanations for specific sections in just seconds.
But what's actually happening behind the scenes?
In this Blog, I'll walk you through building your own PDF chatbot using Python, LangChain, FAISS, and a local LLM like Mistral.
To be clear, this isn't meant to compete with existing solutions. Think of it as a hands-on learning project that helps you understand the core concepts chunking, embeddings, vector search, and RAG step by step.
Let's jump straight into the practical example. We'll cover the theory as we go!
Tech Stack Overview for the Chatbot
LangChain, launched in 2022 by Harrison Chase as an open-source project, is a framework that makes it easier to build applications with language models.
For this project, we'll use Python as our programming language and Anaconda to manage our environments and packages.
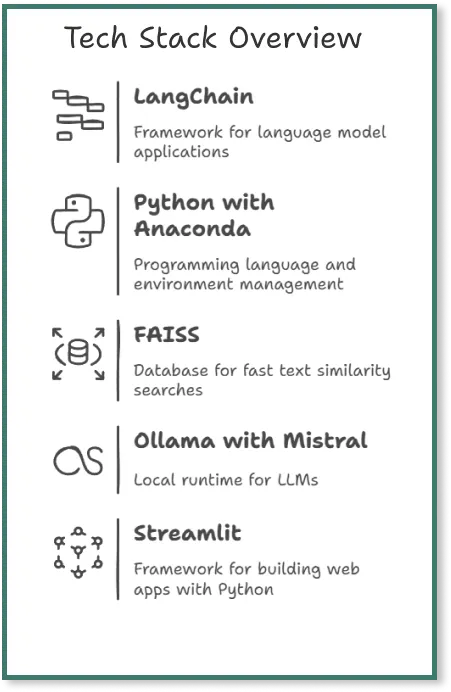
FAISS (Facebook AI Similarity Search) is a vector database built for fast similarity searches across large collections of text embeddings. We'll use it to store chunks of our PDF and quickly find relevant passages when needed.
Ollama is a local runtime server that lets us run LLMs like Mistral, Llama, and DeepSeek directly on our computer—no cloud connection required. For this project, we'll be using Mistral as our language model.
For the user interface, we'll use Streamlit, an open-source framework that makes it easy to build simple web apps with Python.
Preparation
First, we set up our project environment, install all the required packages, and install Ollama.
1. Python and Anaconda for Environment Management
Make sure Python is installed on your system. If you're new to this, open your terminal and type python --version to check that you have at least Python 3.7.
I'm using Anaconda for this project. Open the Anaconda prompt and create a new environment with:
conda create -n pdfchatbot python=3.10
Then activate it with:
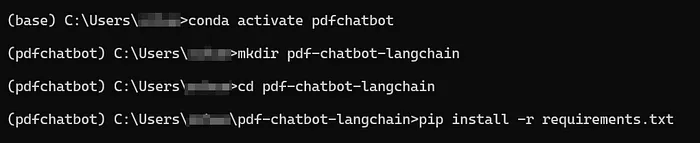
conda activate pdfchatbot
2. Project Folder
Create a project folder with mkdir pdf-chatbot and navigate into it with cd pdf-chatbot.
3. Requirements.txt with all Required packages
Create a requirements.txt file in your project folder and add these packages:
langchain langchain-community pypdf faiss-cpu sentence-transformers openllama streamlit
A requirements.txt file lists all the Python packages your project needs. This makes it simple to recreate the same environment on another machine or share your project with others.
4. Installing all packages
Install everything at once by running:
pip install -r requirements.txt
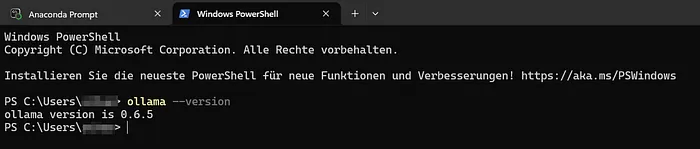
5. Installation of Ollama: Now we'll install Ollama so we can run LLMs locally. Head to the official Ollama download page and follow the installation steps for your operating system.
Once the installation is complete, verify it worked by opening a terminal and running:
ollama --version
Now we open a second Anaconda Prompt Terminal, activate our environment and run Ollama. We do this in a second terminal, as the terminal then remains "blocked" because the model is waiting for our input. This will become clearer in steps 5 and 6 below.

Step-by-Step Guide for the Chatbot
The goal of this app is simple: ask questions about a PDF document in natural language and get answers based on the content of that document not general knowledge. The app combines a language model with intelligent document search to find relevant passages and generate accurate answers.
1. Creating 3 files
Open your preferred IDE (I'm using Visual Studio Code) and create three separate files for our chatbot code.
We're splitting the code across three files to separate the logic from the interface. While this isn't strictly necessary for a small app like this, it's a good practice that's worth learning from the start.
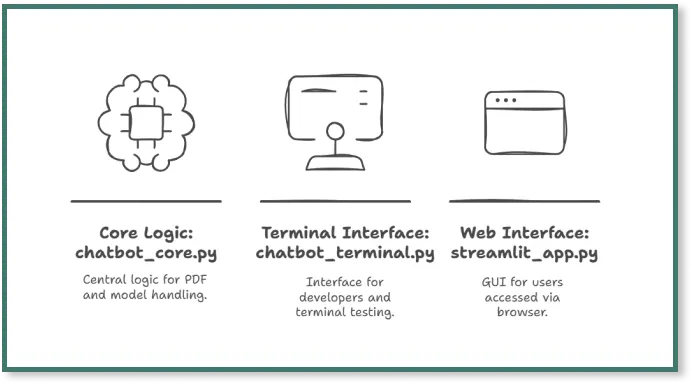
2. File 1: chatbot_core.py
In this file, we'll build the RAG pipeline that follows this flow: PDF → Chunks → Embeddings → Vector database → Retriever → LLM. Here's the code:
What happens in the code?
First, we load the required packages:
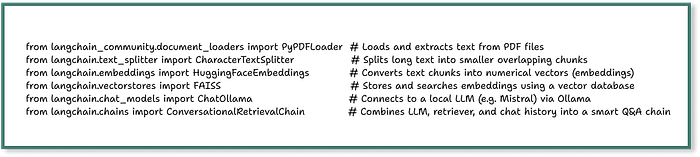
After loading the packages, we create a function called build_qa_chain() that walks through all the necessary steps:
1. Loading the PDF: Load your PDF into the pdf-chatbot directory we created earlier. The code uses PyPDFLoader(pdf_path) to read the PDF, and we're skipping the title page since it only contains an image without text.
Make sure your PDF contains actual text, not just images. This loader is provided by LangChain to read files and convert them into document objects that LangChain can work with.
In Python, lists start at index 0, so [1:] skips the first page.
2. Chunking: Next, we split the text into smaller pieces so we can store individual sections in the vector database.
The CharacterTextSplitter() divides the entire PDF text into overlapping chunks. In this example, each chunk is 500 characters long with a 100-character overlap between consecutive chunks. These chunks are stored in the docs variable.
Why is this necessary?
Language models like Mistral or GPT can't process massive texts all at once. Imagine trying to feed a 50-page PDF in one go. By breaking the text into smaller chunks with some overlap, we ensure that important context at chunk boundaries isn't lost.
3. Embeddings: We create embeddings using HuggingFaceEmbeddings(model_name='...').
What are embeddings? They're mathematical representations of text as vectors. Once text is converted into embeddings, an AI model can compare which texts are similar—for example, which chunks best match a user's question.
With LangChain, we use the HuggingFaceEmbeddings class and the all-MiniLM-L6-v2 model from HuggingFace, which works well for this project.
4. Vector Database: We create a FAISS vector database with FAISS.from_documents(docs, embeddings).
The database automatically converts each chunk into an FAISS entry using embeddings, then we extract a retriever from it.
What is FAISS?
FAISS (Facebook AI Similarity Search) is a vector database from Facebook that stores text chunks based on their embeddings from the previous step. This allows the system to quickly find similar text passages when we ask a question. The impressive part? With LangChain, we only need a single line of code to set this up.
What is a retriever?
A retriever connects the user's question to the vector data. When we ask a question, the system converts it into a vector and searches the FAISS database for the most similar chunks. These similar chunks are likely the most relevant text sections for our question.
However, the retriever doesn't create the complete answer on its own it only returns the relevant text chunks that probably contain the answer. Think of it as the research department. Using a retriever also reduces hallucinations from the LLM because it works with a specific selection from the PDF rather than generating answers from memory.
5. Large Language Model: The LLM takes the chunks provided by the retriever and generates a response in natural language. This is the basic principle of RAG.
In the llm line, we specify that we want to use the Mistral model, which Ollama is running locally. This is why we entered the command ollama run mistral in a separate terminal during the setup steps.
What is Ollama?
Ollama is a tool that makes it easy to run LLMs locally on our own computer. It doesn't require complex setup, API keys, or cloud providers. Ollama runs in the background and provides an API that LangChain can access directly - No API key needed.
In our project, we use Ollama to run Mistral locally. This means we don't need a connection to the cloud (like OpenAI or Hugging Face), we have no API costs, and the model runs without a GPU directly on the CPU. With just a single line of code, we can integrate Ollama into LangChain. This makes it perfect for a small PDF RAG project like this that runs directly on a laptop.
6. Conversational Retrieval Chain: With ConversationalRetrievalChain, we combine the language model (Mistral) with the retriever (from FAISS) into a question-answer chain.
7. Answer as the result: At the end, we return the finished chain with return qa_chain, which we can use in chatbot_terminal.py or streamlit.py.
The model stays the same, but it gets access to an external knowledge source (in this project, a specific PDF), which reduces hallucinations.
3. File 2: streamlit_app.py
With this file, we create the graphical user interface (GUI) for the PDF chatbot. To keep things simple, we'll use a basic setup:
What happens in the code?
- First, we set the title and layout for the Streamlit page.
- Next, we use build_qa_chain to create the LLM and retriever chain from the PDF.
- Then we use an if statement to check whether a chat history already exists—if not, we start with an empty history.
- With st.text_input(), we create an input field where users can enter their questions.
- With the if question statement, we send the question to the QA chain and receive an answer from the LLM.
- Finally, we save the question and answer in the session state and display the previous questions and answers.
4. File 3: chatbot_terminal.py
We created this file so we can test the PDF chatbot directly on the terminal without launching the Streamlit interface. This lets us see how the bot responds to questions and what the sources look like, which is helpful for learning and useful during development:
What happens in the code?
- First, we import the function build_qa_chain, which prepares the entire model, embeddings, and retrievers.
- With the line qa_chain = build_qa_chain(), we start the RAG pipeline with our example PDF.
- With chat_history, we create an empty list to store questions and answers.
- Then we display a greeting for the user and explain how to exit the chat.
- With the while loop, we allow questions to be asked continuously until the user enters 'exit' or 'quit'.
In the last part of the code, we pass the question to the QA chain. This chain combines the language model with the document search and provides an answer. The answer is then displayed in the terminal, including a short excerpt from the text section that the model used to answer the question.
5. Let's run the Streamlit app
Now we enter streamlit run streamlit_app.py in the terminal.
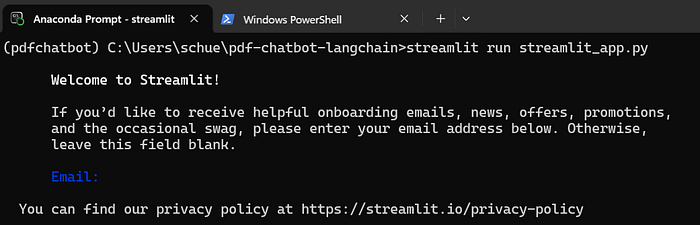
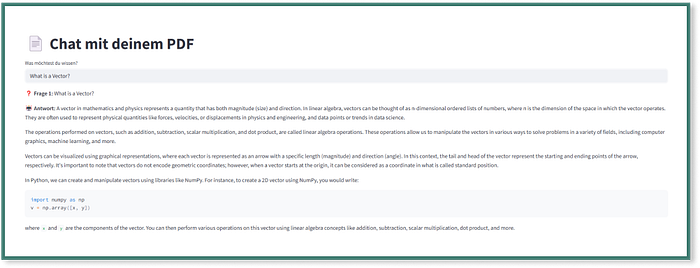
The Streamlit app then opens automatically and we can ask our question:
Final Thoughts - How could we develop the app further?
We've now built a simple chatbot that can answer questions about the PDF 'Practical Linear Algebra for Data Science'. With open-source tools like Python, LangChain, Ollama, and FAISS, we created a working version in a short amount of time.
Going through each step yourself is particularly valuable - It gives you a much better understanding of how chunking, embeddings, vector databases, and the basic logic behind RAG-based chatbots work.
How could we further develop the app to make it more practical?
- Improving the performance: It currently takes around 2 minutes to receive a response. We could speed this up with a faster LLM or better hardware resources.
- Making the app publicly accessible: The app currently only runs on your local computer. With Streamlit Cloud, we could deploy it and make it publicly accessible.
- PDF upload by user: Right now, the PDF is hardcoded. We should add an upload button in the Streamlit app so users can upload and process any PDF they want.
- Better UI: The Streamlit interface is extremely basic. We could use HTML and CSS to visually separate questions and answers. We could also display the PDF source that the answer came from.


.png&w=1200&q=75)